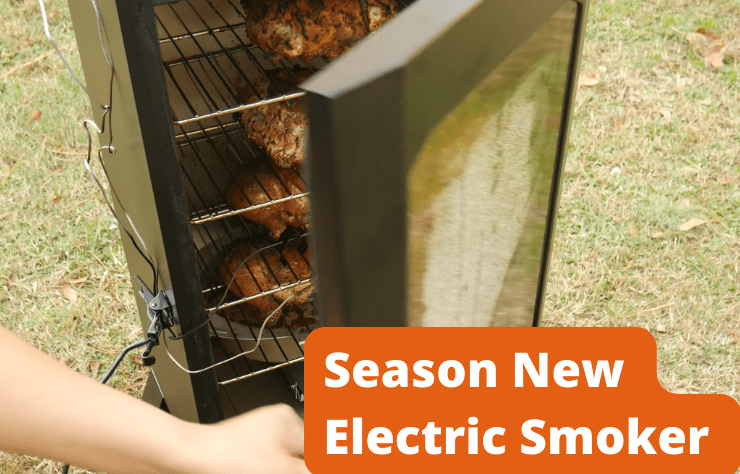
You got your brand-new electric smoker, probably very excited to use and eat some delicious meat. But first, you need to ‘season’ your electric smoker before using it for the first time. It might feel like a time-consuming effort and useless, but you will be thankful later because it is necessary and will surely increase the taste of your food.

‘Seasoning’ is a ‘dry run‘ of the smoker, your first time using it. Every model is different and works at different temperatures, so by seasoning the smoker, you can get to know the working of the smoker easily and can also know how to operate it. And if you’re a total beginner, then you would surely love our “How to season an electric smoker for the first time?” guide.
Why Is There a Need for Seasoning a Smoker?
A kid gets a new toy, and he wants to start playing with it right away. That’s also the case for electric smokers.
You probably think about cooking your favorite meal on your new electric smoker. In fact, you are quite excited about it, but then someone interrupts and says you got to do seasoning first. You probably wouldn’t want to, but we have a very good reason why you should.
Seasoning a smoker helps out with the following:
- Burnout the Residue:
Manufacturers are most likely not to clean it before fully shipping it to your home. During the production process of the smoker, it is most likely exposed to chemicals, solvents, and other things. You probably don’t want these hanging around in the place of cooking.
Seasoning a smoker burns out and removes the most likely residue of petroleum products and other dirt. Seasoning is the easiest way to get rid of all that and make your electric smoker a hygienic place to cook.
- Protection Against Rust:
The paint layer on your electric smoker is likely to catch rust because of all the moisture and oil. Seasoning protects the paint layer by curing it and making the smoker rust-proofed.
- Black-Smoke Layer:
Adding a few wood chips at the end of the seasoning process will add a thin layer of black smoke all around inside your smoker. Not only does it protect the electric smoker, but it also imparts a smoky flavor in the meat, which gives it a delicious taste. Over time, this will build up, and food taste will also get better.
How to Season Your Electric Smoker (Step-by-Step):
Following are the most common steps that are applicable to every model of electric smoker:
- Unpacking and Assembly:
Take your brand-new smoker from the packing. Some models need a little assembly by yourself, and you can do that by following the guidelines given in the booklet. If it’s pre-assembled, make sure all the corks and screws are tightened. Place the smoker in a place where there is proper ventilation.
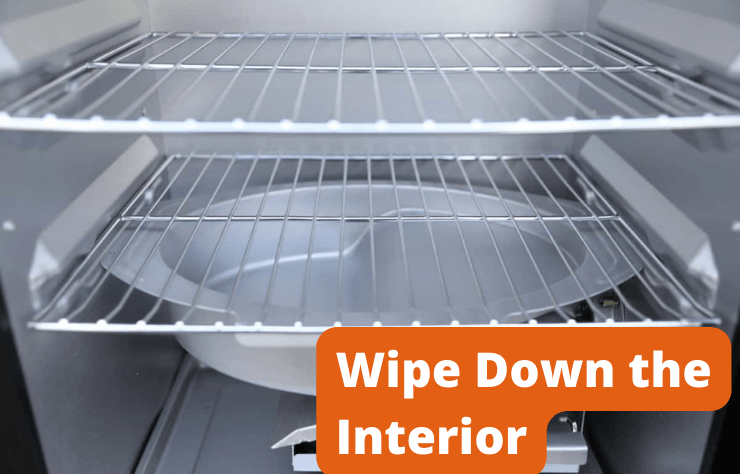
- Wipe Down the Interior:
Clean the smoker’s interior by using a damp cloth soaked in mild detergent. Slowly wipe down the interior walls of the smoker with a cloth. It will remove the dust.

Make sure not to put any marks or scratches over it. After cleaning, wash out the interior with water and a clean cloth. In the end, open the door and let it air-dry.
- Coating of Oil Layer:
After the smoker is fully dry, you need to put a coat of oil layer on the interior walls. You can use a spray or a soft cloth for that. Dip the cloth in oil, soak it, and slowly put a soft coat of oil inside. The oil doesn’t need to be dripping from the walls, a thin layer of oil coat will do.

You can also use a brush. Don’t oil the smoker’s body, as on heating it, oil can ignite the fire, and that’s not good for you. After the coating, put the components, heating body, wood chip tray, eater bowl back in. Make sure to leave all the trays and water bowls empty.
- Starting Up the Smoker:
You are going to start the smoker for the first time. The best place you can have a smoker is an open area like a backyard rooftop with proper ventilation.
- Opening the Vent Completely:
Make sure to leave the vent fully open during the seasoning process. The vent is from where the burnout residue and vapors leave. You don’t want to keep that in.
- Plugging In the Smoker:
Take the wire and plug it into a power socket. Do that in a direct socket rather than using an extension cord.
- Heat the Smoker:
You can finally start heating. Some models have a maximum temperature of 350-400 °F. You should set the temperature as close as possible to 275 °F and set the time limit for 3 hours. You might feel some odor because of oil burning and form the residue, but that’s okay.

- Adding Wood Chips:
With 45 minutes left on the clock, you should add some wood chips to the wood-chip pan. The standard quality should be half a cup of wood chips. Make sure not to overload the pan. Some companies instruct not to use the wood chips, but the chips are not to be used as a fuel source but for the aroma in the meat. We will discuss the best type of wood chip later in the blog.
- Cooling Down:
After the seasoning process is done, carefully open the door of the electric smoker and let it cool down. However, beware of the steam burns.
Make sure it’s cool enough and wipe down the interior and bars with a cloth. It’s ready for the next and official use. If the party is next week, wrap it up and store it. But if you keep your smoker outside, the rain might rust it.
How to Maintain an Electric Smoker?
When the smoker is not in use, you should casually clean it from time to time. Direct sunlight and rain can affect its durability.
- The best time to clean off the residue is when it’s warm enough, not too warm to cause injury.
- You need any detergent etc., and a simple cloth to do the quick job.
- If the smoker got a glass front, it would be full of fleck and speck. Take a simple cloth or towel, wet with water, and wipe down. It will shine as new.
- Make sure to take out all the ash residue.
- Wipe out the outside of the smoker too.
The best Type of Wood for Seasoning and Cooking:
In the case of seasoning, you can use oak. It is most commonly used for seasoning purposes. Oak is slow-burning, and hence it will last long enough.
Mesquite is also something to consider. It has the strongest flavor for a block of wood so that it can take out any potential bad smell.
For cooking purposes, you should consider which type of meat you’re cooking before choosing the wood type. Some woods are compatible with red meat, while some work well with poultry, fish, salmon, etc.
Applewood (beef, poultry), walnut wood (red meat), and oak wood are noteworthy types. Whereas, pecan wood chips are compatible with all kinds of meat.
FAQs:
- Do I need water in my electric smoker?
Water pans are placed under the meat. It would help if you filled it with water rather than left it empty. Water helps in maintaining the temperature. If it’s warm outside, water can absorb some heat to keep it even. It also produces extra smoke and makes the meat juicier.
- What is the best oil for seasoning?
Cooking oil is the best for seasoning a smoker. But you can also use canola oil and peanut oil for seasoning purposes. Olive oil is also the best option, but use the one with the high-burning, so it may not start a fire.
- What should I smoke first?
When cooking for the first time on a smoker, choose cheaper cuts of meat. Start with a full roaster or chicken. You will be in a learning period during your first few times.
- Should I soak the wood chips before adding them?
You can use dry wood chips as well as wet. Dry chips will burn a lot faster and produce very high smoke. Whereas, the wet wood chips (pre-soaked) will burn slower and produce light smoke.
Final thoughts
Getting a new gadget is always an exciting experience. Seasoning is not a complicated thing to do, but it’s very beneficial for you in the long term.
We know you learned quite best from our exclusive “How to season an electric smoker for the first time?” guide.


